
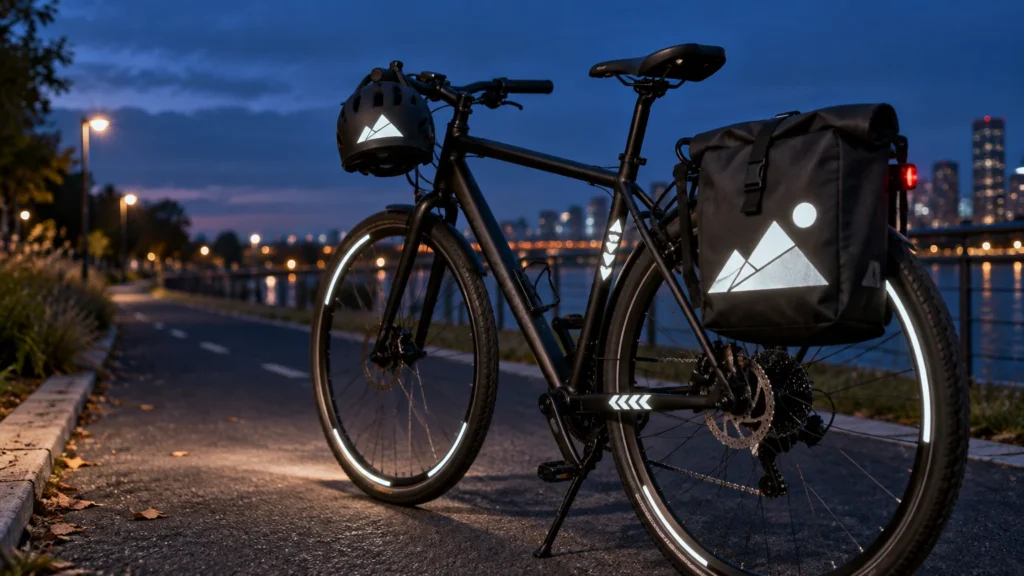
TLDR: Reflective bike stickers can add passive nighttime visibility when light shines toward them. Use shaped decals on frames and accessories, narrow tape or purpose-made strips on suitable rims, and larger panels on panniers, cargo boxes or trailers. Keep every piece away from braking surfaces, tires, drivetrains, cables, vents, lights and existing reflectors. Stickers supplement active lights and required bicycle equipment; they do not replace them.
The best reflective bike stickers are not necessarily the brightest-looking pieces in an online photo. The right choice depends on the direction the sticker faces, the shape and finish of the surface, and whether that location gets rubbed, flexed or sprayed with road grime. A broad decal can work well on a flat cargo box, while the same construction may wrinkle or lift on a narrow, tightly curved tube.
Start by deciding where you want another reflective surface: front-facing, rear-facing or visible from the side. Then select a format that sits flat without interfering with the bike. Think of the resulting pattern as an extra layer of conspicuity rather than a substitute for a headlight, rear light or installed reflector.
How reflective bike stickers work
Retroreflective material sends incoming light back generally toward its source. On a bicycle, that means a sticker becomes most noticeable when it is illuminated from a useful angle by headlights or another light source. Reflective bicycle equipment is intended to help a bicycle be recognized and identified when illuminated by motor-vehicle headlamps.
That behavior explains both the value and the limitation. A reflective decal does not create its own light, and it will not look equally bright from every viewing angle. Its performance depends on illumination, orientation, the material’s construction and whether dirt or wear has covered the reflective face.
NHTSA distinguishes active bicycle lighting from passive visibility aids and reports that lights may improve detection more effectively than passive aids. NHTSA’s bicycle-lighting guidance Use stickers to add reflective area and recognizable shapes, but begin a night-riding setup with appropriate active lighting.
Choose the right reflective format
| Format | Best suited to | Main advantage | Main constraint |
|---|---|---|---|
| Die-cut reflective decals | Frame sections, fenders, helmets and hard accessories | Custom shapes and clean visual integration | Small details and sharp points can lift more easily |
| Continuous reflective tape | Long tubes, rack rails and simple edges | Easy to size into long strips | May wrinkle on compound curves |
| Purpose-made rim strips | Compatible wheel rims | Creates side-facing reflective movement | Must fit the rim and avoid braking surfaces |
| Larger reflective panels | Panniers, cargo boxes and trailers | More reflective area on broad surfaces | Needs a sufficiently flat, compatible substrate |
| Installed bicycle reflectors | Bike, pedals and wheels in specified positions | Designed as bicycle safety equipment | Not a decorative substitute for custom graphics |
Die-cut decals
Die-cut decals make sense when appearance matters as much as placement. Simple arrows, blocks, chevrons and bold geometric marks usually use reflective material more efficiently than delicate lettering. A compact shape also fits between frame hardware, cable paths and bottle-cage mounts more easily than a long strip.
If you are ordering custom stickers for a logo or coordinated graphic set, simplify the outline and ask how small gaps, narrow strokes and pointed tips will be produced. The design should remain recognizable from a distance rather than depending on tiny reflective details.
Reflective tape and larger panels
Tape is practical for straight runs and gentle curves. It can be trimmed around rack rails, fenders or broad frame sections, but narrow strips are easier to manage than one wide band on a curved tube. Round the corners after cutting when the product instructions permit it; exposed sharp corners are natural snag points.
Larger panels are a better match for panniers, rigid cargo boxes and trailer surfaces. They provide room for a simple block, chevron or outline that can be understood quickly. Seams, buckles, soft fabric folds and high-wear edges can interrupt adhesion, so divide the design into separate pieces rather than bridging moving sections.
Rim strips
A purpose-made rim strip can create strong side-facing visual movement as the wheel turns, but wheel compatibility matters. Never place an adhesive strip on a rim-brake track. Keep it away from the tire bead, spoke access points, wheel sensors and any area identified by the rim or strip manufacturer as unsuitable.
Disc-brake wheels may provide more non-braking rim surface, but that does not make every strip compatible with every rim finish or profile. Narrow channels, deep curves and textured carbon surfaces can all complicate application. Use a wheel-specific product with instructions that cover the exact surface and brake arrangement.
Where to place reflective decals on a bike
A useful layout addresses more than one viewing direction. Before removing any backing, stand several feet from the bicycle and inspect it from the front, rear and both sides. Temporary paper shapes or low-tack layout markers can reveal whether frame tubes, wheels, bags or the rider will block the proposed decal.
- Front-facing: Consider the front of a rigid cargo box, the forward face of a fork where approved by the bike or component maker, or suitable parts of a front rack. Do not cover the headlight, front reflector, cables or steering clearances.
- Rear-facing: Broad rear fenders, rigid pannier faces, cargo boxes and trailers can accept simple blocks or chevrons. Keep clear of the rear light, reflector, hinges and attachment hardware.
- Side-facing: Frame tubes, fender sides, panniers, trailers and compatible rims are the main opportunities. A design on only the outward side of a bag may disappear when the bag is removed, so consider the bike’s usual configuration.
- Moving areas: Wheel treatments can add motion, but decals must never touch brake tracks, tires, chains, cassettes, rotors, cranks or derailleur mechanisms.
- Accessories: NHTSA safety material identifies reflective tape or stickers as options for bicycles, helmets, backpacks, footwear and outerwear. Use only products compatible with the accessory’s material and instructions.
Do not cover a factory reflector simply because a decorative decal appears larger. CPSC guidance for covered bicycles describes a reflector arrangement that includes a colorless front reflector, a red rear reflector, pedal reflectors, and wheel reflectors or qualifying reflective rims or tire sidewalls. CPSC bicycle requirements guidance Aftermarket decorative stickers should not be assumed to qualify as that equipment.
Match the film to the surface
“Reflective vinyl” describes a category, not one universal construction. Reflective sheeting is available in different grades and constructions intended for different jobs. Check the selected product’s documentation for its intended substrate, weather exposure, conformability, application temperature and removal method.
Surface geometry is especially important. Technical information for one 3M removable reflective graphic film distinguishes among flat surfaces, moderate curves and more demanding shapes, illustrating why compatibility must be checked product by product. A film that lies cleanly on a pannier panel may not conform properly around a compact frame junction or helmet vent.
- Smooth painted frame: Often the easiest decal surface, provided the finish is clean, intact and listed as compatible with the adhesive.
- Matte or textured paint: Adhesion and removal behavior are product-specific. Texture reduces the available contact area, so test only as permitted by the bike and film manufacturers.
- Carbon components: Follow the frame or component maker’s care instructions, particularly for adhesive compatibility and removal. Do not use aggressive scraping or unapproved solvents.
- Plastic fenders and cargo boxes: Plastic type matters. Some low-surface-energy plastics are difficult for ordinary adhesive films.
- Fabric panniers: Use a product expressly intended for fabric if applying directly. A rigid plastic panel or compatible sewn-on reflective component may be more suitable than ordinary vinyl.
- Helmets: Do not assume that a frame decal is safe for helmet shells. Use only stickers or reflective products permitted by the helmet manufacturer, and keep vents and retention hardware unobstructed.
Outdoor exposure adds another layer to the decision. Ask for a specific statement about the film’s intended exterior use rather than relying on the word “vinyl.” Water contact, sunlight, road grit, repeated cleaning and abrasion at the edges are separate stresses. For a broader look at difficult outdoor substrates and edge wear, see our guide to choosing vinyl for kayaks and rough handling.
Design reflective graphics for recognition
Reflective material rewards restraint. A few large shapes generally read more clearly than a dense illustration filled with small cuts. Leave enough material around internal openings, avoid hairline details and consider how the graphic looks when only part of it catches the incoming light.
Use repeated elements to create a visual system across the bicycle: matching bars on both fork sides, paired rear-facing blocks or a sequence of side-facing rectangles. Symmetry is easy to recognize, but the pieces must not interfere with controls or components merely to preserve the pattern.
Color should be treated as a design choice within the selected product line, not as a universal measure of effectiveness. The supplied product documentation should identify the reflective construction and intended use. Do not infer nighttime performance from daylight color or a seller’s staged flash photograph.
Application checklist
- Read the film and bike-component instructions before using cleaners, heat or pressure.
- Confirm that the proposed location remains clear through steering, suspension movement, wheel rotation and cable travel.
- Wash away mud and grit, then prepare the surface only with a cleaner approved for both the substrate and adhesive product.
- Dry the area completely, including seams and recessed edges where water can remain.
- Position the unpeeled decal with removable layout tape and inspect it from the intended viewing direction.
- Apply at the temperature and with the technique specified by the film maker. Avoid stretching ordinary tape around curves unless the product permits it.
- Press the face and edges evenly. Do not use excessive heat on frames, helmets, bags or components.
- Recheck brake, tire, drivetrain and cable clearances before riding.
- Inspect edges periodically and replace pieces that are lifting, deeply scratched or obscured by grime.
On curved surfaces, several smaller pieces are often easier to apply than one large graphic. This also limits the amount that must be replaced if an edge is damaged. For powder-coated racks or accessories, our guide to stickers on powder-coated surfaces explains why texture, curvature and edge placement deserve extra attention.
What reflective stickers cannot replace
Reflective stickers need an external light source, so they cannot perform the same role as a powered headlight or rear light. They also should not cover or replace factory-installed reflectors. Bicycle equipment and night-riding rules vary by jurisdiction and type of bicycle, so check the requirements that apply where you ride.
Treat the visibility setup as layers: active lighting first, existing reflector equipment intact, and thoughtfully positioned reflective material on compatible surfaces. That approach gives reflective decals a clear job without asking decorative adhesive film to function as regulated equipment.
Final recommendation
Choose reflective bike stickers by location rather than buying one sheet for every surface. Use bold die-cut shapes on smooth frame or accessory panels, continuous tape on suitable straight runs, purpose-made strips on compatible non-braking rim areas, and larger panels on panniers or trailers. Keep the design simple enough to read at a glance.
Before ordering, map front-, rear- and side-facing locations, measure the usable flat area and note every cable, seam, vent and moving component. Then verify the film’s compatibility with the exact substrate. Keep your lights and installed reflectors unobstructed, and let the stickers do what they do best: add passive reflective area when another light reaches them.