
TLDR
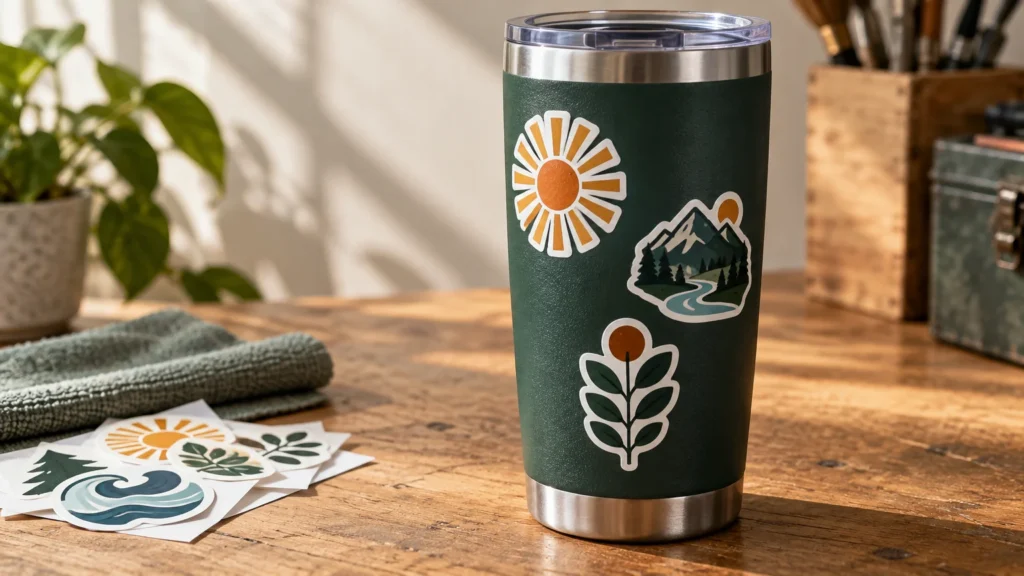
The best stickers for powder coated tumblers are laminated vinyl stickers with permanent adhesive, provided the coating is relatively smooth, clean and undamaged. Choose a compact die-cut shape with rounded contours, keep it away from strongly curved transitions, and press the entire sticker firmly onto the surface. Hand washing gives the edges the easiest life, even when the tumbler itself is rated for a dishwasher.
Powder coating is the variable that matters most. A smooth powder-coated cup may accept a quality vinyl sticker cleanly, while a coarse pebbled finish leaves less surface area for the adhesive to contact. For a questionable coating, test one sticker before decorating an entire set.
How to choose the best stickers for powder coated tumblers
Start with a flexible vinyl facestock, permanent pressure-sensitive adhesive and a protective laminate. The vinyl needs to conform to the tumbler’s curve, the adhesive needs to tolerate regular handling, and the laminate protects the printed surface from moisture and rubbing. “Waterproof” in a product name is useful only when the complete construction—including ink, vinyl, laminate and adhesive—fits the job.
CustomStickers currently describes its waterproof stickers as vinyl with a laminate coating, permanent adhesive, and matte or gloss finish options. It also identifies tumblers and dishwashers as intended applications. In our broader hands-on printer testing, CustomStickers earned 5/5 for quality and 5/5 for price, making it our preferred place to start when ordering custom laminated stickers for this use.
That recommendation applies to ordinary printed tumbler stickers, not every possible coating or washing routine. The sticker still has to make intimate contact with the powder coat. Texture, oils, cleaning residue, curved areas and lifted edges can defeat an otherwise good material.
| Use case | Sensible construction | Main consideration |
|---|---|---|
| Everyday personal tumbler | Laminated vinyl with permanent adhesive | Compact shape and careful surface preparation |
| Branded giveaway | Laminated vinyl with permanent adhesive | Use a size that recipients can apply without wrinkling |
| Temporary decoration | Removable adhesive, if offered for the chosen material | Easier removal may trade away some holding power |
| Dishwasher-heavy routine | A supplier-rated construction for that use | Edges and repeated heat exposure remain the vulnerable points |
| Coarse or pebbled powder coat | Test sample before a full order | Texture reduces adhesive contact |
Powder-coat texture can make or break adhesion
Powder coating is not one uniform surface. Some tumblers feel almost like smooth painted metal. Others have a fine grain, pronounced pebbling or a soft-touch character. Two cups that look similarly matte can behave differently when a sticker is applied.
The 3M general installation guidance explains that surface texture and paint characteristics can affect film selection, application, adhesion and eventual removal. It also identifies cleaning, temperature, application pressure and elapsed time as factors in adhesive bonding. Although this guidance addresses adhesive films broadly rather than tumbler stickers specifically, the practical lesson transfers: the adhesive must contact the surface rather than merely bridge across the high points of a texture.
A lightly textured tumbler may still work if the sticker is flexible and applied with firm, even pressure. A heavily pebbled coating is much less predictable. Look across the applied sticker under side lighting. Tiny pale channels, unbonded patches or edges that spring back indicate incomplete contact.
Use a test sticker when the finish is unusually rough, slick, damaged or unknown. Clean a small area, apply the same sticker construction you intend to order, and observe the edges through normal handling and washing. Testing is especially worthwhile before producing branded sets or decorating expensive drinkware.
Permanent adhesive is the practical default
A tumbler is handled, gripped, placed in cup holders and washed. For lasting decoration, permanent adhesive is generally a better match than removable adhesive or static cling. Static cling is intended for suitable smooth surfaces such as glass and is not the right format for a typical powder-coated cup.
Permanent does not mean impossible to remove, nor does it promise identical performance on every coating. It means the adhesive is formulated for a lasting bond rather than clean short-term repositioning. Removal results can vary with adhesive type, coating condition and how long the sticker has been attached. If preserving the finish is the highest priority, test removal in an inconspicuous area or use a product specifically sold as removable.
Choose a shape that cooperates with the curve
Tumbler stickers fail first at their edges. A large rectangle asks a flat piece of material to follow curvature across its full width, while four sharp corners provide obvious starting points for lifting. A smaller die-cut design with rounded contours is usually easier to apply cleanly.
This does not mean every round sticker is automatically more durable than every square one. The useful principle is to reduce edge stress. Avoid placing the design across a shoulder, tapered transition, ridge or other area where the cup’s profile changes quickly. A relatively straight section of the tumbler wall gives the sticker a better chance to lie flat.
Before ordering, make a paper mock-up at the intended size. Hold it against the cup and inspect it from the front and side. If the paper buckles, bridges or needs substantial force to follow the curve, reduce the width or divide the artwork into separate decals. Our guide to choosing water-bottle stickers by material, fit and care provides additional help for sizing around curved drinkware.
Matte versus gloss laminate
Both matte and gloss laminate can make sense on powder-coated tumblers. Choose between them primarily by appearance and feel rather than assuming one finish will solve an adhesion problem. The adhesive beneath the vinyl—not the sheen on top—is what bonds to the cup.
- Matte laminate blends naturally with many matte powder coats and reduces hard reflections. It suits understated branding, line art and softer color palettes.
- Gloss laminate makes saturated colors and dark outlines look punchier. It creates a visible contrast against a matte cup and is easy to recognize as a deliberate sticker finish.
- Either surface can show handling in different ways. Gloss reveals fingerprints and reflections more readily, while matte can show rubbing or burnished spots depending on the construction.
A matte-on-matte combination can look almost printed onto the tumbler, while gloss creates a classic sticker appearance. Pick the visual effect you want, then concentrate on material flexibility, adhesive and application quality for performance.
White vinyl is safer than clear for dark tumblers
White vinyl is the straightforward choice when color accuracy and readability matter. Its opaque base keeps the powder-coat color from showing through the artwork, so pale colors, white lettering and fine details remain visible.
Clear stickers can look excellent when the design intentionally uses the tumbler color as part of the artwork. On a black, navy or other dark cup, however, ordinary transparent inks can lose contrast. White areas in the digital file do not necessarily become printed white ink. If the design needs opaque white or bright colors, confirm that the printer offers a white-ink underprint and check its placement in the proof.
Clear material also makes trapped dust, fingerprints and unbonded areas easier to notice. Apply it in strong light and inspect the surface carefully before the adhesive touches the cup.
How to prepare and apply a tumbler sticker
Good application is less about a special trick than controlling contamination, alignment and pressure. Follow the tumbler manufacturer’s care instructions, particularly when choosing a cleaner. Do not use a solvent merely because it is commonly recommended for another type of surface.
- Inspect the powder coat. Do not apply over flaking, chipped or visibly damaged coating.
- Wash or clean the application area using a method permitted by the tumbler maker. Remove grease, lotion, drink residue and cleaning-film residue.
- Let the surface dry completely. Moisture trapped around the edges works against clean adhesive contact.
- Bring the tumbler and sticker into a comfortable indoor environment. Avoid applying to a cup that is very cold, hot or covered with condensation.
- Use a paper template or a small piece of low-tack tape to plan the position before exposing the adhesive.
- Peel back part of the liner without touching the adhesive. Anchor one section, then lower the sticker gradually rather than dropping the whole piece onto the cup.
- Work from the center outward with firm, overlapping pressure. Pay particular attention to narrow points, small details and the entire perimeter.
- Inspect the sticker under angled light. Press down any area that appears silvered, tunneled or incompletely bonded.
- Allow the adhesive time to build its bond before washing or hard use. Follow the sticker supplier’s stated waiting period when one is provided.
Pressure matters even on a surface that appears smooth. 3M notes that firm application pressure may be needed to achieve full adhesive contact and that bond strength increases over time. A quick swipe with a thumb is not always enough, especially around the far edges of a wide design.
The dishwasher reality check
A dishwasher-safe tumbler does not automatically make an attached sticker dishwasher safe. Those are separate products with separate care requirements. YETI, for example, says its Rambler drinkware is dishwasher safe and advises against bleach and abrasive cleaners, but that guidance covers the drinkware rather than every aftermarket sticker someone might apply to it.
Some sticker suppliers explicitly rate particular laminated vinyl products for dishwasher use. CustomStickers makes that statement for its waterproof sticker product. Even then, correct application and full edge contact matter. A lifted corner gives water and mechanical contact a place to work.
If maximizing sticker life is the priority, hand wash the decorated exterior with a nonabrasive cloth and avoid scraping directly across the edges. If dishwasher convenience is essential, order a construction the sticker supplier identifies for that use, follow both manufacturers’ care instructions and keep the sticker away from ridges or sharply changing curves.
Why tumbler sticker edges lift
Peeling usually points to a mismatch among the surface, sticker shape and application. Repeatedly pressing down an already contaminated edge rarely fixes the underlying problem.
- The powder coat is too textured for complete adhesive contact.
- Oil, lotion, soap film or moisture remained on the cup.
- The sticker spans a compound curve or a fast-changing taper.
- A sharp corner catches on hands, towels or cup holders.
- The sticker was washed or heavily handled before its bond had time to build.
- The vinyl is too stiff for the curve or the adhesive is intended for temporary use.
- The sticker is oversized for the available straight section of the tumbler.
If one small corner lifts immediately after application and the adhesive is still clean, apply firm pressure again and give the bond time to develop. If the edge has collected lint or repeatedly springs back, replacement with a smaller or rounder sticker is usually cleaner than trying to seal the failed edge.
What to order
For most relatively smooth powder-coated tumblers, order laminated white vinyl stickers with permanent adhesive in a compact die-cut shape. Choose matte laminate when you want the design to blend with a matte coating, or gloss when you want brighter visual contrast. Use clear vinyl only when the artwork is designed around transparency or the printer can add the white underprint your colors require.
CustomStickers is our overall vendor pick for this job because its listed waterproof construction fits the use case and it delivered excellent quality and value in our hands-on testing. Buyers comparing it with another premium-quality option can also see our CustomStickers versus Sticker Mule evaluation. Whichever printer you choose, review the proof for finished size, cut shape, border thickness and any white-ink layer before approving production.
Final recommendation
Match the sticker to the actual tumbler, not just the product name. Use flexible laminated vinyl, permanent adhesive, a manageable die-cut shape and an application area with the least texture and curvature. Prepare the coating carefully, press every edge firmly and let the adhesive establish its bond before washing.
If the cup has a coarse pebble finish or an unusual soft-touch coating, test one sticker first. That small trial will tell you more than applying a large design and hoping the adhesive can bridge a difficult surface.