
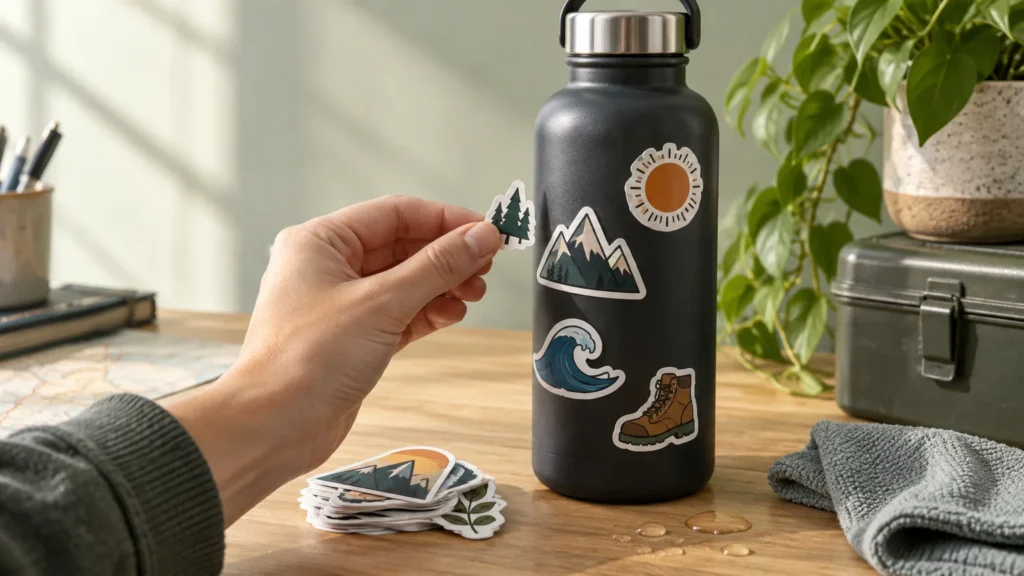
TLDR: The simplest answer to how to choose stickers for water bottles is to start with care, not artwork. Choose a finished sticker explicitly rated for the way you wash the bottle, keep the design compact enough to sit without wrinkling on the curved surface, and favor rounded edges that are less likely to catch during handling. If the bottle has a textured, powder-coated or soft-touch finish, test one sticker before placing a larger order.
A water bottle sticker has a harder job than it appears. It gets gripped, rubbed against bags, exposed to condensation and washed repeatedly. A good-looking vinyl sticker can still fail if its edges cross a tight curve, its adhesive dislikes the bottle coating or its care rating does not match your routine. The best choice is a laminated or otherwise protected sticker whose supplier clearly states the intended water and washing resistance.
How to choose stickers for water bottles by washing routine
First decide whether the bottle will be hand-washed or regularly placed in a dishwasher. These are different exposure levels. A waterproof claim usually indicates that a sticker can tolerate water contact, but it does not automatically establish resistance to repeated dishwasher heat, detergent, spray pressure and drying cycles.
Some suppliers market products specifically as waterproof stickers, while others publish separate guidance for tumblers or water bottles. Treat those statements as product-specific rather than as a promise about every vinyl sticker. Sticker Mule, for example, maintains a dedicated FAQ about using its stickers on tumblers. Check the current care language for the exact product you plan to buy rather than transferring that guidance to another material or printer.
| Your routine | What to look for | Practical choice |
|---|---|---|
| Occasional splashes and indoor use | Water-resistant printed surface and dependable adhesive | A standard quality vinyl sticker may be sufficient |
| Regular hand-washing | A protected print surface and supplier guidance allowing water exposure | Laminated vinyl with rounded edges |
| Frequent dishwasher use | An explicit dishwasher-safe statement for the finished sticker | Only order a product rated for that washing method |
| Uncertain care rating | Low-quantity ordering or a sample | Test before decorating the full bottle |
The phrase “finished sticker” matters. Vinyl describes the facestock, but performance also depends on the ink, protective layer, adhesive, cut and exposed edges. A bare printed vinyl and a laminated vinyl sticker are not interchangeable merely because both product pages use the word vinyl.
Choose a compact shape that can follow the bottle
Reusable bottles are curved, and many are also tapered. A small sticker only has to bend in one direction across a gentle curve. A wide graphic may encounter changing curvature, recessed bands, seams or a narrowing body. That is when bubbles, wrinkles and lifting edges become more likely.
Before ordering, identify the smoothest usable section of the bottle. Measure its width and height, then make the sticker smaller than that area rather than designing right to its boundaries. Leave extra space around shoulder curves, the bottom transition, handles, grip bands and any area repeatedly contacted by a cup holder.
As a practical test, cut the proposed shape from ordinary paper. Hold it against the empty, room-temperature bottle without adhesive. If the paper buckles, crosses a body line or refuses to lie naturally against the surface, the finished sticker is too large or poorly positioned. Reduce its width, simplify the shape or divide the artwork into several smaller decals.
Rounded edges usually wear better
Circles, ovals and rounded rectangles are forgiving choices for bottles. Their edges offer fewer sharp points that can catch on fingers, towels and bag pockets. An intricate die-cut silhouette can still work, but narrow projections and pointed tips create vulnerable areas. If the art includes tiny spikes, loose lettering or delicate appendages, consider adding a simple outer contour around the complete design.
The cut border is functional as well as visual. A slightly wider border can connect fragile sections and make application easier. A white border also keeps dark artwork readable on a dark or strongly colored bottle.
Match the material and finish to the artwork
For most reusable bottles, protected white vinyl is the safest general-purpose choice. The white base keeps colors predictable on stainless steel, tinted plastic and painted surfaces. A protective laminate or comparable finish helps isolate the printed surface from routine rubbing and moisture, provided the complete product is rated for the intended care.
- Gloss emphasizes saturated colors and produces a familiar slick sticker appearance. Reflections can make small text harder to read under bright directional light.
- Matte reduces glare and feels more subdued. It suits illustration, muted palettes and bottles already finished in matte paint.
- Clear material allows the bottle color to become part of the design. Pale ink and unprinted areas may disappear on a dark bottle unless the printer offers an appropriate white underprint.
- Holographic, glitter and metallic materials work best when the effect has room to show. Fine detail can compete with the changing reflection, so use bold shapes and clear contrast.
Clear stickers require the most planning. Transparent film does not make the printed design automatically opaque. Ask whether the printer uses white ink beneath selected artwork areas and review the proof against a color similar to the bottle. Without white ink, dark bottle colors can substantially alter light colors in the design.
Specialty material can be worth choosing for a decorative centerpiece, but standard white vinyl is easier to predict. If you are comparing a conventional sticker order with an effects-heavy project, our CustomStickers versus StickerApp comparison explains why the best printer can change when specialty finishes become the priority.
Consider the bottle surface before ordering
Smooth glass, smooth plastic and untextured painted metal generally give an adhesive a more uniform contact area than coarse or rubberized finishes. Powder coating is not one single surface: texture, formulation and surface energy can vary. Silicone sleeves, pebbled coatings and soft-touch finishes are especially uncertain because the adhesive may contact only the high points of the texture.
Do not assume that a sticker suitable for one stainless-steel bottle will behave identically on every coated bottle. For an uncertain finish, place one small sticker in an inconspicuous area and monitor the edges through normal handling and washing. A sample is much cheaper than discovering that an entire custom run is a poor match.
- Smooth bare or painted metal: usually the most straightforward bottle surface, assuming it is clean and undamaged.
- Smooth rigid plastic: often workable, but adhesion can vary with the specific plastic and surface treatment.
- Glass: smooth and easy to inspect for contamination, although condensation and washing still make edge quality important.
- Powder-coated metal: commonly decorated, but texture and coating composition make testing worthwhile.
- Silicone or rubberized areas: generally poor candidates for ordinary pressure-sensitive stickers.
- Deep texture, seams and embossed logos: avoid when choosing the application position.
Prepare and apply the sticker carefully
Even the right sticker can lift when it is placed over skin oil, soap residue, dust or trapped moisture. Apply it to an empty bottle at room temperature. Choose a clean workspace, wash your hands and inspect the proposed position under good light.
Follow the sticker supplier’s preparation instructions, especially when it specifies a particular cleaner or waiting period. Treat surface preparation and application as separate parts of the job; Avery Dennison publishes dedicated technical guidance for substrate cleaning and preparation and for pressure-sensitive film application.
- Clean the application area using a method compatible with the bottle manufacturer’s care instructions.
- Remove cleaner residue and allow the surface to dry completely.
- Position the sticker before exposing the entire adhesive. A small piece of removable tape can serve as an alignment marker.
- Set one portion down gently, then smooth the sticker across the curve rather than dropping the complete piece at once.
- Press from the center toward the perimeter to move air outward.
- Trace the complete edge with firm, even finger pressure, paying special attention to points and narrow sections.
- Follow the sticker supplier’s instructions before washing or heavily handling the bottle.
Do not place a decorative sticker inside the bottle, on the drinking rim or where it will interfere with a lid seal. Keep it on the exterior body, away from moving parts and areas that must remain clean for normal drinking and closure.
Pick the format that matches the project
Individual die-cut stickers are convenient for a single centerpiece design, giveaways and designs sold as separate pieces. Kiss-cut stickers retain a larger backing around the cut shape, which protects delicate edges before application and makes small stickers easier to peel.
Sticker sheets make sense when you want several small designs arranged across one bottle. Smaller pieces handle curvature better, and the owner can build a layout around logos, seams and grip areas. Sheets are also useful when each design is too small or intricate to manage comfortably as an individual loose piece.
For a coordinated set, keep the cut style and border treatment consistent even when the artwork varies. Repeating one border color or corner radius makes the bottle look intentional without forcing every sticker into the same dimensions.
Common water bottle sticker failures
- The sticker is too wide for the bottle’s usable curve, causing wrinkles or lifted sides.
- A sharp corner sits where fingers repeatedly grip the bottle.
- The design crosses a seam, embossed logo, taper or recessed band.
- The surface was cleaned but not fully dried before application.
- The buyer relied on the word waterproof without checking washing instructions.
- Clear artwork was ordered without considering the bottle color or white ink.
- Small text or thin lines were reduced until they became difficult to print and inspect.
- A large order was placed for an uncertain powder-coated or soft-touch surface without testing a sample.
Custom water bottle sticker ordering checklist
When ordering custom stickers for a water bottle, give the printer a job it can evaluate clearly. Know the bottle surface, intended size and washing routine before choosing a product. If you are comparing vendors for a standard vinyl order, our CustomStickers.com versus Sticker Mule guide covers the broader quality-and-value decision.
- Measure the flattest usable area rather than the bottle’s total width.
- Use a paper mockup to check curvature and visual scale.
- Confirm the finished sticker’s water and washing guidance.
- Ask what protects the printed surface.
- Choose rounded corners or a durable outer contour.
- For clear material, confirm how white ink or an underprint will be handled.
- Review the proof at the final physical size, not only enlarged on a screen.
- Inspect cut lines, borders, small text and narrow projections.
- Order a sample or low quantity when the bottle coating is uncertain.
- Save the supplier’s care instructions for the people who will use the stickers.
The practical recommendation
For most personal reusable bottles, start with a compact laminated white-vinyl sticker with a simple die-cut shape and rounded edges. Place it on the smoothest central area of the bottle and plan to hand-wash unless the exact finished product is explicitly rated for dishwasher use.
Choose clear or specialty film only when its visual effect improves the design enough to justify the extra artwork planning. For a textured or powder-coated bottle, test one small sticker first. Measure the usable panel, make a paper mockup and confirm the supplier’s care language before ordering; those three steps prevent most disappointing water bottle sticker projects.