
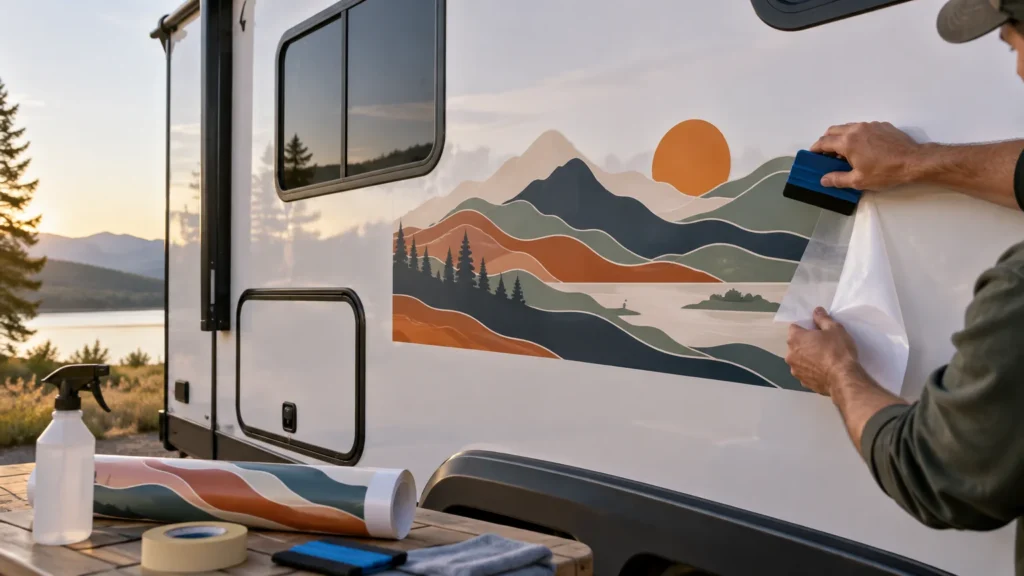
TLDR: Choose custom RV decals and stickers by graphic size and panel shape, not just by the artwork. Small names, campsite graphics and unit numbers can work as individual decals on clean, smooth panels. Large graphics crossing corrugations, rivets, recesses or compound curves need a compatible vehicle-film system and usually professional installation. Do not cover cracked graphics, oxidation or failing paint, and keep all graphics clear of emergency exits and visibility-critical glass.
An RV graphic has a harder job than an ordinary bumper sticker. It covers a larger area, sits in the sun for long stretches and may have to conform around seams, body lines, rivets and curved corners. The right buying question is not simply “vinyl or sticker?” It is: what part of the RV are you covering, how complex is that surface, and how large is the finished design?
Start with the right graphic format
Vehicle-graphics terminology can be loose, but the scale of the project changes what you should order. 3M separates decals or spot graphics, partial wraps and full wraps in its fleet-graphics guidance, and recommends considering the application surface, intended service life and use conditions when selecting materials.
| Format | Best fit | Typical installation path |
|---|---|---|
| Individual sticker or decal | A small campsite illustration, club badge or decorative accent on a smooth panel | DIY when the piece is manageable and the surface is sound |
| Cut-vinyl lettering | RV name, website, phone number or unit identification without a printed background | DIY for short, modestly sized lines; professional help for long layouts |
| Contour-cut spot graphic | A printed logo or illustration cut around its outside shape | DIY on a flat area; installer for large pieces or difficult contours |
| Partial wrap | Large artwork covering one section or several connected panels | Professional vehicle-film production and installation |
| Full wrap | A coordinated design covering most painted exterior panels | Professional survey, artwork setup, production and installation |
For a small design on a smooth fiberglass or painted aluminum panel, an individually cut, laminated decal is the sensible starting point. Standard custom vinyl stickers can suit compact decorative graphics when the specific product is intended for the expected outdoor exposure and compatible with the panel.
Move into vehicle-graphic territory when the design is several feet wide, spans doors or storage compartments, follows a deeply curved front cap or crosses several surface types. At that scale, the film, laminate, panel layout and installer form one system. Ordering the artwork as an oversized version of a small sticker does not solve those application problems.
Match the vinyl system to the RV panel
RV walls are not interchangeable substrates. 3M’s graphic-film categories for personal recreation vehicles account for flat surfaces, corrugation, rivets, simple curves and compound curves. That distinction matters because a material that lies neatly on a flat sidewall may bridge a corrugation, pull away from a recess or tent around a rivet.
Smooth fiberglass or painted panels
A clean, smooth and sound panel is the easiest candidate for a small decal. Keep the edges away from door gaps, hatch openings, trim and sealant where possible. A little empty space around the design makes alignment easier and reduces the number of exposed edges near high-contact areas.
Do not assume that a fiberglass body automatically provides a good surface. Oxidation, chalking, wax, silicone-based treatments, cracked clear coat and residue from old graphics can interfere with the application. If a clean cloth picks up a powdery residue or the coating is peeling, stop and have the surface evaluated before ordering a large graphic.
Corrugated aluminum and riveted walls
Corrugation turns a simple rectangle into a three-dimensional application. The vinyl must follow each ridge and valley without being stretched carelessly across the low areas. Rivets create additional edges where air can collect and lifting can begin. Use a film system explicitly suited to that surface and choose an installer who has worked on corrugated or riveted vehicles.
A small decal can sometimes sit entirely on one broad, flat ridge. If it cannot, avoid treating corrugation as a minor inconvenience. Distorted lettering and uneven reflections become obvious when a design repeatedly rises and falls across the siding.
Curves, channels and front or rear caps
Cast vehicle film is generally the better class of material for demanding conforming applications. Avery Dennison’s vehicle-wrapping guidance describes cast films as suitable for convex, concave and compound curves and notes their lower tendency toward shrinkage-related lifting when correctly processed and installed.
Complex contours require more than flexible vinyl. Installation technique, stretch control, heating and edge management all affect whether the graphic remains seated. 3M specifically identifies concave channels, wheel-well areas and other complex contours as zones requiring particular attention to reduce lifting risk. A large design over a molded front cap or deep recess belongs with a professional installer.
Choose artwork and finish for an RV-sized viewing distance
An RV graphic is usually seen from several yards away. Strong silhouettes, large lettering and controlled color contrast work better than tiny text or intricate outlines. If the design includes a business name or rental-fleet identifier, print it at actual output size during proofing and check that the important wording remains readable from the intended distance.
- Use cut vinyl for simple one- or two-color lettering when you do not need a printed background.
- Use a contour-cut printed graphic for illustrations, gradients, photographs or multicolor logos.
- Divide large artwork at sensible panel gaps rather than placing important faces or words across doors and hatches.
- Keep fine details away from the cut edge, especially on narrow points that will be exposed to washing and handling.
- Ask for a scaled placement proof showing the RV side, not only a close-up of the graphic file.
Gloss tends to produce stronger reflections and a freshly painted appearance. Matte reduces glare and can feel more subdued, while satin sits between those looks. Finish is mainly a visual decision, but the overlaminate must also be compatible with the printed vehicle film. For a large exterior graphic, order the print film, adhesive and laminate as a specified system rather than mixing unrelated materials.
There is no useful universal lifespan number for every RV decal. Outdoor performance changes with the exact film and laminate, panel orientation, climate, storage, washing, abrasion and edge exposure. Ask for the published specification or warranty that applies to the complete film system, installation surface and orientation being proposed.
DIY or professional installation?
A compact decal on a reachable, smooth panel is a reasonable DIY project. A tall sidewall graphic that requires ladders, alignment across multiple sections or controlled stretching is not. The cost of professional installation starts making sense well before the design reaches full-wrap size.
A practical DIY checklist
- The decal fits comfortably within a smooth, uninterrupted area.
- You can reach the entire placement without leaning from an unstable ladder.
- The graphic does not cross corrugations, rivets, seams, trim or deep curves.
- The panel is clean, dry, smooth and free of failing coatings or old adhesive.
- The design can be positioned with simple measurements and temporary alignment marks.
- You have the manufacturer’s application instructions for the exact material.
Choose professional installation if any of those conditions fail. Large-format installers can also identify where a design should be divided, whether a proposed edge is risky and which film category fits the contour. For a wrap or a large partial graphic, the installer should be involved before the final artwork is built—not after the printed roll arrives.
Where RV graphics should not go
Do not place vinyl over rubber seals, silicone, flexible plastics or unpainted textured plastic. 3M’s vehicle-application guidance advises against those substrates. Sealant around windows and roofline fixtures is especially poor real estate for a decorative graphic.
Emergency exits must remain fully usable. Graphics should not cover latches, instructions or openings in a way that restricts emergency-window operation. Treat the complete window movement and exit path as a keep-clear zone, not just the handle.
Avoid perforated or opaque graphics where they interfere with driver visibility or where local law prohibits them. 3M does not support perforated window graphics that obstruct driver visibility. Confirm applicable vehicle-window rules before placing graphics on cab glass.
Replacing faded or missing RV graphics
Replacement graphics require more documentation than a new decorative sticker. Before removing anything, photograph each side square-on and take close-ups of corners, overlaps and color transitions. Include a ruler or tape measure in detail photos, then record the distance from fixed references such as compartment doors, marker lights and panel seams.
- Photograph the full RV side with minimal perspective distortion.
- Measure the overall width and height of each graphic section.
- Record distances from permanent body features.
- Photograph the closest available color reference in neutral daylight.
- Note which sections cross seams, rivets, corrugation or curved caps.
- Supply original vector artwork when available; otherwise ask whether redraw work is required.
- Have the installer inspect old adhesive, oxidation and coating condition before approving production.
Do not apply a replacement directly over cracked or peeling graphics. The new vinyl will inherit the unstable texture and edges underneath. Likewise, a decal cannot repair failing clear coat or disguise serious oxidation reliably. Removal and preparation should be planned around the RV’s actual coating and panel condition.
If the original graphic includes a manufacturer logo or protected artwork, obtain permission or an authorized replacement rather than assuming a printer can reproduce it. A custom design inspired by the RV’s colors is often easier to produce cleanly and avoids passing off a recreation as an original marking.
Business, rental and fleet RV graphics
Commercial RV graphics need to remain readable while the vehicle moves and must be reproducible when another unit joins the fleet. Keep a master package containing vector logos, brand colors, typefaces, panel measurements and approved placement proofs. Store a production file for each RV model because doors, vents and compartment layouts may differ even when the branding looks identical.
Put the primary business name and contact action on the broadest uninterrupted viewing area. Secondary messages can occupy doors or rear panels, but avoid building one critical line across several moving compartments. Unit numbers and required operational markings should remain separate files so one damaged element can be replaced without reproducing the entire design.
Reflective graphics and paint protection are different products
Reflective material is useful when a logo, unit number or safety-related marking must return light at night. Order purpose-made reflective graphic material and discuss the application with a vehicle-graphics specialist. An ordinary decorative metallic or shiny sticker is not a substitute for reflective film, and decorative reflective graphics should not be presented as satisfying regulated conspicuity requirements without the applicable specification.
Paint-protection film is also separate from printed graphics and color-change wrap vinyl. Its primary job is protecting paint from physical damage rather than displaying artwork. If the goal is a campsite illustration or business logo, choose a graphic film. If the goal is impact protection on a painted front cap, discuss a purpose-made protection film instead.
Custom-order checklist
- Straight-on photos of every intended placement area
- Close-ups showing texture, seams, rivets, recesses, sealant and existing damage
- Overall graphic dimensions and distances from fixed body features
- RV year, make, model and body construction when known
- Vector artwork or the highest-resolution original file available
- Desired gloss, satin or matte appearance
- Expected storage, sun exposure, washing and travel conditions
- Confirmation of whether the job is DIY or professionally installed
- A placement proof showing doors, windows, vents, hatches and panel gaps
- The film, adhesive and laminate specifications for large exterior graphics
The same environment-first thinking applies to other vehicles used around water and sun; our guide to choosing custom boat decals explains additional placement and exposure considerations for marine graphics.
The practical recommendation
Order a small laminated decal or cut-vinyl lettering when the artwork fits within a smooth, sound and easily reached section of the RV. Step up to a specified vehicle-graphic system when the design is large, conforming or divided across several panels. Corrugation, rivets, molded caps and deep channels are signals to involve an experienced installer early.
Before requesting a quote, take straight-on photographs, measure from fixed body features and decide whether the project is a decal, spot graphic, partial wrap or full wrap. That short preparation step will do more for the finished result than choosing a material from a generic list without showing the supplier what it must stick to.