
TLDR
The best decals for boats depend on the job. Choose premium cast cut vinyl for registration numbers, boat names and simple one- or two-color lettering. Choose laminated printed cast vinyl for detailed logos, gradients and full-color art. For large hull accents or broad color changes, use a suitable wrap film and professional installation. Unless the product documentation specifically permits immersion, keep ordinary decals and wrap films above the waterline.
Finding the best decals for boats is less about choosing the flashiest finish and more about matching the construction to the surface, artwork and exposure. A rigid, flat transom name and a graphic stretched around a compound hull curve do not ask the same thing of the vinyl. Sun, salt spray, washing, fenders and repeated contact at docks make edge placement and laminate especially important.
Best decals for boats by job
| Boat decal job | Best starting choice | Why it fits | Watch for |
|---|---|---|---|
| Registration numbers | Premium cast cut vinyl | Crisp block characters, no printed background and good conformity | Federal and state display rules |
| Boat name or hailing-port lettering | Cast cut vinyl | Clean painted-on appearance for solid-color lettering | Thin strokes, tight spacing and hardware near the design |
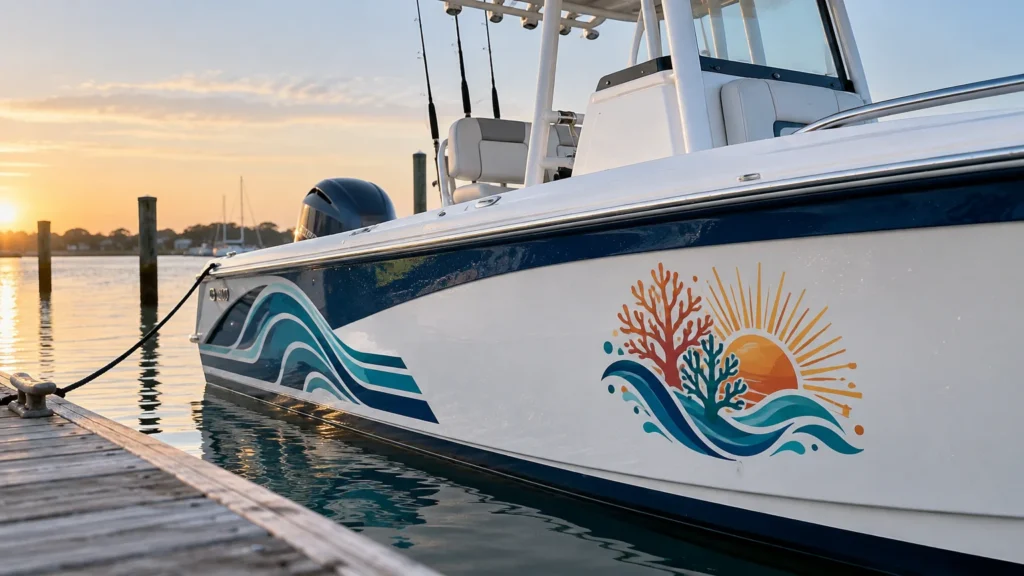
| Full-color logo or illustration | Printed cast vinyl with compatible overlaminate | Supports gradients, shading and detailed artwork | Exposed edges, inadequate contrast and missing protective laminate |
| Pinstripes and accent shapes | Cast cut vinyl or a purpose-made marine graphic film | Works for long, simple shapes and moderate curves | Sharp body lines and installation tension |
| Large hull graphic or color change | Compatible wrap system | Designed for broad coverage and complex placement | Waterline limits, seams, panel geometry and installer skill |
| Inflatable or highly flexible surface | Substrate-specific product | Adhesive must match the tube material and repeated flexing | Standard boat vinyl may not bond reliably |
Premium cast cut vinyl is the strongest default for uncomplicated exterior lettering. Avery Dennison, for example, identifies its SC 950 Series as a cut-vinyl film suitable for complex curved surfaces and lists marine uses among its applications. Its published performance information also addresses UV, temperature, humidity and salt-spray exposure, with durability varying by color and finish.
That does not mean every product described as “marine vinyl” is equivalent. When ordering, ask for the exact film series, adhesive and expected application zone. The useful specification is not simply “waterproof”; it is whether the complete graphic system suits the boat’s substrate, curves, sunlight and intended location.
Registration numbers must be readable before they are decorative
For a federally numbered vessel, the number must be attached or painted on each side of the forward half of the boat. The characters must be plain vertical block characters at least three inches high, contrast with the background and remain distinctly visible and legible. Federal rules also specify spacing or hyphens between the letter and number groups. Read the complete federal vessel-number display rule before finalizing the artwork.
A pre-spaced cut-vinyl set with an application mask is usually the cleanest format. It keeps the characters aligned as one unit while leaving only the lettering on the hull after installation. Individual peel-and-stick digits can work, but they make consistent baselines and spacing harder to achieve.
Choose contrast for the actual hull, not for the white proofing screen. Black, navy or another dark solid generally reads clearly on a light hull. White or a light solid can work on a dark hull. Metallic, patterned and low-contrast colors may suit decorative names, but registration characters should prioritize quick recognition.
State validation decals and registration procedures can add requirements beyond the federal number-display rule. Confirm placement and current instructions with the agency that registered the boat before applying the set.
Cast vinyl versus calendered vinyl
Cast film is the safer choice for long-term exterior lettering, tight curves and graphics that need to sit cleanly across changing contours. It is generally thinner and more conformable than economy calendered film, making it better suited to the shape changes common on hulls and personal watercraft.
Calendered vinyl can still make sense for temporary event graphics, dockside promotions or flat, short-term applications. Its appeal is usually cost. The tradeoff is that a budget film is a less comfortable choice where the graphic must conform around a curve, tolerate prolonged exterior exposure or keep narrow edges settled.
Film grade is only one part of the system. Adhesive selection, surface preparation, installation tension and edge location all affect the result. A premium film placed over wax, oxidation or failing paint is still likely to disappoint.
Cut lettering versus laminated printed graphics
Use cut vinyl for solid-color designs
Cut vinyl is ideal for registration numbers, simple boat names, hailing-port text, pinstripes and logos that can be separated into a few solid colors. The plotter cuts the design from colored film, so there is no printed ink layer and usually no rectangular background. A transfer mask holds the separate elements in position during application.
Avoid extremely thin serifs, tiny gaps and delicate flourishes. They create fragile points that are harder to weed, apply and clean around. On a boat viewed from a dock or another vessel, slightly heavier strokes usually look better anyway.
Use printed and laminated vinyl for detailed artwork
A printed decal is the better format for gradients, photographic details, multicolor illustrations and logos that would require too many separate cut-vinyl layers. Specify an exterior-grade cast print film and a compatible overlaminate. Avery Dennison describes graphic overlaminates as protective films for digitally printed graphics that can improve exterior durability and color longevity.
The laminate protects the printed face, but edges remain important. Keep the graphic away from rub rails, trailer bunks, fender contact points and places where lines or cleaning tools repeatedly scrape the hull. Rounded corners also present fewer snag points than sharp corners.
For smaller custom logos and individual printed pieces, custom printed vinyl decals can be a practical ordering route. Ask the printer to identify the base film and laminate rather than selecting solely from a generic outdoor-durability label.
When a boat graphic becomes a wrap
A decal is a localized piece of lettering or artwork. A wrap covers a substantial section of the hull and demands a different installation plan. Large graphics have to negotiate body lines, fittings, intakes, seams and compound curves while maintaining visual alignment from normal viewing distance.
3M describes Wrap Film Series 2080 as a multilayer cast adhesive film for accents, personalization and larger coverage. Its repositioning and air-release features are intended to make installation more manageable. For personal-watercraft graphics, the supplied product bulletin limits use to areas above the static waterline.
That restriction is specific to this film guidance, but it illustrates the right buying habit: check the exact product bulletin before putting any ordinary wrap or decal below the waterline. Continuous immersion is different from rain, spray or occasional washing. Below-waterline work needs a system explicitly approved for that location and substrate.
Professional installation becomes worthwhile when a graphic spans several feet, crosses strong curves or must align around hardware. A small positioning error in a registration set is visible; the same error across a large hull graphic can distort the whole composition.
Design and ordering checklist
- Measure the usable surface rather than estimating from the overall hull length.
- Photograph the area straight-on and mark vents, fittings, seams, rub rails and likely fender contact.
- Confirm whether the surface is gelcoat, painted fiberglass, aluminum, polyethylene or an inflatable tube material.
- Use compliant block characters and spacing for registration numbers.
- Choose solid cut vinyl for simple lettering and laminated printed vinyl for detailed color artwork.
- Ask for the manufacturer and series of the vinyl, adhesive and laminate.
- Design for the hull color and normal viewing distance, not just close-up screen appearance.
- Request a scaled proof showing the cut line, overall dimensions and orientation.
- For matched graphics on both sides, confirm whether one side must be mirrored.
- Verify product-specific waterline restrictions before ordering or installing.
Polyethylene kayaks and similar low-surface-energy craft present a different adhesion problem from smooth gelcoat. Our guide to choosing vinyl for kayak stickers explains why water exposure is only one part of that decision.
Application basics for a cleaner result
Apply graphics to a clean, dry and sound surface. Remove dirt, salt residue and wax using products appropriate for the hull finish, then follow the vinyl manufacturer’s preparation and temperature instructions. Do not bridge a decal across removable hardware, damaged paint or an edge where direct water flow can work against it.
Use masking tape to establish a level reference and check the appearance from several feet away before removing the liner. A hinge method can keep medium-sized lettering aligned. Large printed graphics and wraps require more control over tension, air release and post-heating, which is another reason to use an experienced installer.
After application, give the adhesive the manufacturer’s specified time and conditions to settle before launching or washing. Inspect edges periodically, particularly around sharp contours and areas exposed to fenders or cleaning brushes.
Removing old boat decals without abusing the gelcoat
Old marine vinyl can become brittle after years of sunlight and saltwater exposure. Gelcoat may also show “ghosting,” where the protected area beneath the decal differs visually from the exposed surrounding surface. West Marine’s removal guidance recommends controlled heat, plastic scrapers and a marine-safe adhesive remover rather than aggressive tools or harsh solvents.
Work gradually. Warm a manageable section, pull the vinyl back at a low angle and use a plastic tool where necessary. Test any adhesive remover in an inconspicuous area and follow the hull or coating manufacturer’s care instructions. Even when the adhesive comes away cleanly, a color or oxidation difference may remain and require separate surface correction.
Final recommendation
For most boat names and registration numbers, order pre-spaced lettering cut from a premium cast vinyl. For a full-color logo, choose an exterior cast print film with a compatible protective overlaminate. Move to a purpose-selected wrap system and professional installer when the design covers a substantial part of the hull or crosses complex curves.
Before buying, answer three questions: what is the exact hull material, will the graphic remain above the waterline, and will it be rubbed by fenders, bunks or cleaning equipment? Those answers matter more than a broad “marine-grade” label and will lead you to a decal that looks intentional instead of becoming an early replacement job.
References
- SC 950 Series | Avery Dennison | Graphics
- 33 CFR § 173.27 – Numbers: Display; size; color. | Electronic Code of Federal Regulations (e-CFR) | US Law | LII / Legal Information Institute
- Overlaminate Films | Avery Dennison | Graphics
- Product Bulletin 2080 September 2024.pdf
- How to Remove Vinyl Boat Decals | West Marine | West Marine