
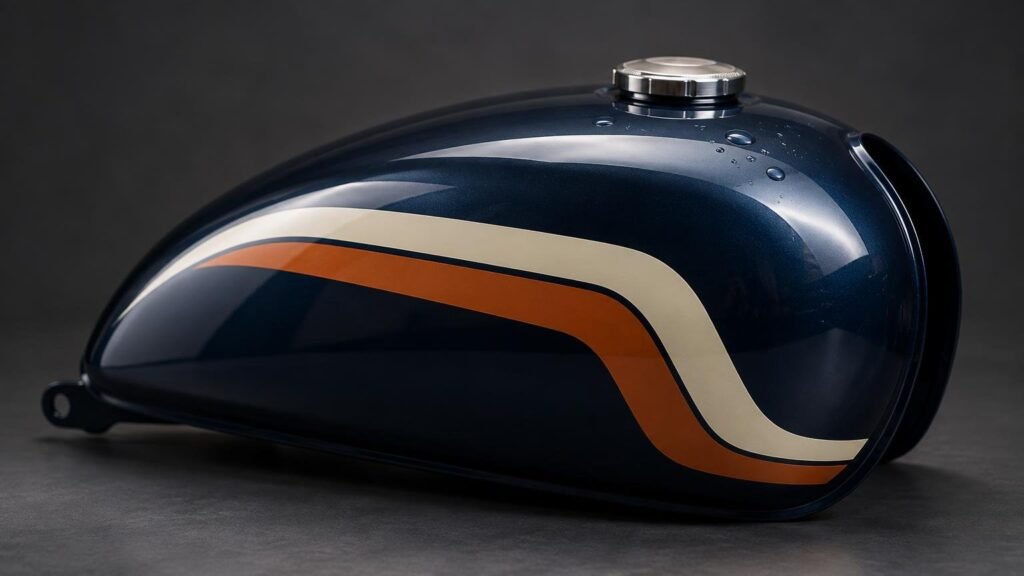
TLDR: Custom motorcycle tank decals work best as modest-sized, laminated vinyl graphics placed on smooth, sound paint along a gently curved side of the tank. If the design must cross the crown, wrap around a sharp ridge or settle into a recess, ordinary sticker vinyl may not conform reliably; use a documented vehicle wrap film and consider professional installation. If protection from stone chips and scratches is the main goal, choose paint-protection film rather than a decorative decal.
A motorcycle tank makes a small decal work surprisingly hard. The surface curves in more than one direction, riders rub it with their knees, fuel can splash near the filler, and a lifted edge is immediately visible. The best result comes from treating the tank as a three-dimensional panel rather than ordering a flat sticker and hoping it stretches into place.
Which product belongs on your tank?
| Product | Best use | Main limitation |
|---|---|---|
| Laminated printed vinyl decal | A logo, number, illustration or accent on a broad, gently curved tank side | Not automatically suitable for deep compound curves or repeated fuel contact |
| Cut-vinyl lettering or shape | Simple one- or two-color graphics without a printed background | Fine details and disconnected pieces can be difficult to align |
| Conformable vehicle wrap film | Graphics crossing the crown, ridges or more demanding curves | Material and installation are more specialized |
| Paint-protection film | Protection-first coverage in vulnerable rubbing or impact areas | Not the same product as an ordinary printed decal |
A decal is a localized graphic. Vehicle wrap film is engineered for broader visual coverage and more demanding contours. Paint-protection film, or PPF, is a protection-first product for vulnerable areas. 3M separates vehicle customization films from its paint-protection products, so the terms should not be used interchangeably.
That distinction matters around knee-contact areas. A colorful printed decal may change the tank's appearance, but it should not be sold or treated as rock-chip protection. If your main concern is protecting the paint where your jacket, riding pants or tank bag rubs, a suitable protective film is the more logical category.
Match the decal to the tank’s curves
Look at the proposed location from the front, side and above. A surface that appears nearly flat from one angle may curve vertically and horizontally at the same time. That is a compound curve, and it asks the film to change shape rather than simply bend.
A small decal can often sit comfortably on the broad side of a tank because it occupies only a limited part of the curve. Trouble starts when the design grows toward the crown, crosses a pressed body line, enters a recess or wraps around the front edge. Standard sticker vinyl may wrinkle, bridge over the low area or pull back at its edges.
Conformable wrapping systems have their own application procedures. For example, Avery Dennison’s instructions for Supreme Wrapping Film address controlled heating and post-heating in critical convex, concave and compound-curve areas. Those instructions apply to that specific wrap system; they do not prove that an ordinary printed sticker can be installed the same way. For a difficult tank, ask the printer to identify the exact film construction or take the job to a vehicle-graphics installer.
Use a paper mock-up before ordering
Print the artwork at full size on ordinary paper, cut around its proposed outline and tape it lightly in position. Do this on both sides if the layout will be mirrored. The mock-up will reveal whether the graphic looks undersized, points downhill or runs into a curve that was not obvious on a screen.
- Measure the maximum width and height of the usable area, not the entire tank.
- Mark the filler-cap boundary, badges, seams, ridges and rubber trim on the template.
- Leave comfortable clearance around sharp body lines and panel transitions.
- Sit on the motorcycle and identify knee, zipper and tank-bag contact zones.
- Photograph each template straight-on and from above for placement reference.
- For paired graphics, record fixed reference points so both sides sit at the same height and angle.
Edge placement matters as much as the vinyl
Decal failures often begin at an edge. Keep the perimeter away from the filler opening, sharp ridges, panel seams and spots that receive constant rubbing. A rounded outline is generally more forgiving than a long needle point or an intricate edge full of tiny projections.
If the artwork must cross a body line, consider splitting it into separate pieces rather than forcing one sticker over the transition. A deliberate gap can look cleaner than a wrinkled bridge. It also gives each section a flatter area in which to establish adhesion.
Avoid placing critical lettering where the tank turns away from the viewer. A logo that is technically intact can still become unreadable when half of it disappears over the crown. Keep the name or central illustration on the most visible plane and let simpler background elements approach the curve.
Inspect the paint before applying anything
Sound paint is a prerequisite. Do not apply graphics over peeling clearcoat, blistering, rust, oxidation, rough repairs or an unstable respray. 3M’s vehicle-graphics guidance identifies these conditions as adhesion and removal risks. A decal cannot stabilize failing paint, and later removal may expose or worsen an existing defect.
Fresh paint also needs to be fully cured according to the paint system’s requirements before a pressure-sensitive film is applied. If the tank has been repaired or resprayed and its history is unclear, ask the painter when adhesive graphics can safely be installed.
Cleanliness matters, but the tank finish determines which cleaner is appropriate. Follow the motorcycle or paint manufacturer’s care instructions, remove wax or oily residue with a compatible product, and allow the surface to dry completely. Do not use an aggressive solvent simply because it evaporates quickly.
Application and later removal both carry more uncertainty on custom paint, pinstriping and older finishes. If preserving a valuable paint job is more important than adding the graphic, have a graphics professional inspect the surface first.
Choose laminated vinyl, but be precise about durability
For an outdoor printed tank graphic, we would generally choose laminated vinyl over an unlaminated print. The laminate places a protective layer over the ink and helps with ordinary weather and sunlight exposure. It does not make every decal resistant to gasoline, aggressive cleaners or sustained knee abrasion.
CustomStickers.com states that its custom vinyl stickers use premium vinyl with a weatherproof, UV-resistant laminate and lists an effective outdoor life of five years. In our broader sticker-printer testing, CustomStickers earned 5/5 for physical quality, price and customer service, making it our first vendor to check for a straightforward tank-side graphic. Riders can browse its custom vinyl sticker options, but should confirm the exact construction and intended exposure before ordering for a fuel tank.
YouStickers is a near-peer option in our testing, also earning 5/5 for quality, price and customer service. Its current product pages describe durable custom vinyl, custom shapes, online proofs, no minimum ordering and matte or gloss laminate choices. That makes it particularly approachable for a one-off placement test or a small matched set.
Neither supplier page cited here establishes suitability for deep compound curves, repeated gasoline contact, fuel vapor or severe knee abrasion. If those exposures are unavoidable, request written confirmation for the exact facestock, adhesive, ink and laminate combination. A general claim such as “waterproof” or “weatherproof” is not a fuel-resistance specification.
For more ordinary wet-use considerations, our guide to choosing a sticker printer for waterproof applications explains why film, adhesive, ink and protective finish need to be considered together.
Gloss or matte laminate?
Gloss laminate usually blends most naturally with glossy clearcoat and gives colors a more saturated appearance. Matte laminate reduces reflections and can suit satin paint or a restrained factory-inspired design, but a matte patch on a gloss tank will remain visibly different under directional light.
Finish matching is aesthetic, not merely technical. Request or buy a small sample when the tank has satin, metallic, pearl or color-shifting paint. Screen previews cannot show exactly how the laminate and paint will interact in sunlight.
Plan for fuel splashes without making false assumptions
The safest design decision is to keep decal edges well away from the filler-cap boundary and any channel where spilled fuel may collect. Do not let a prominent edge terminate directly beneath the cap. If a splash occurs, follow the motorcycle manufacturer’s instructions for the painted surface rather than scrubbing the decal with an unverified chemical cleaner.
Fuel contact is not the same as rain. Unless the supplier documents compatibility for the complete printed construction, do not assume a laminated sticker can tolerate repeated exposure simply because it is described as waterproof. A replaceable accent positioned away from the filler is a lower-risk use than an elaborate graphic surrounding the cap.
Designing decorative and OEM-style graphics
A decorative decal can be an original illustration, number panel, stripe or club graphic sized for the available space. An OEM-style layout demands more discipline because small errors in angle, spacing and symmetry make it look wrong even when the print itself is sharp.
- Use straight-on reference photographs of the exact model and year, not a visually similar tank.
- Measure between physical landmarks instead of scaling artwork from a web image.
- Build left and right versions rather than assuming one file can simply be rotated.
- Keep important text and fine details on the tank’s most visible plane.
- Ask for a proof showing final dimensions, cutline and orientation.
- Do not imply that an aftermarket graphic is an OEM part or licensed reproduction unless that status is established.
- Expect printed color to be an approximation unless a documented color-matching process is included.
Contour-aware cutlines are especially useful. Instead of putting a rectangular background around the whole design, let the outline follow the major shapes while retaining enough solid area to avoid fragile points. The goal is not the most intricate cut possible; it is a clean perimeter that can remain adhered.
Ordering checklist for custom motorcycle tank decals
- Inspect the paint and resolve peeling clearcoat, rust, oxidation or questionable repairs first.
- Tape a full-size paper template to the intended location on each side.
- Record maximum width and height, plus clearance from the cap, seams, ridges and contact zones.
- Decide whether the shape stays on a gentle curve or requires a documented conformable wrap film.
- Choose laminate and finish based on both exposure and the tank’s appearance.
- Send the printer artwork at final size and request a proof with dimensions and cutline.
- Confirm the exact material if fuel contact, heavy abrasion or compound-curve installation is expected.
- Check orientation carefully before approving mirrored left- and right-side graphics.
- Order a spare when alignment is demanding or the decal may be treated as a replaceable wear item.
Pay attention to proof deadlines. CustomStickers.com currently states that proofs are automatically accepted after three days without action, so review the cutline, size and orientation promptly. For a paired tank set, one overlooked mirror error can make half the order unusable.
Our recommendation
For most custom motorcycle tank decals, start with a laminated vinyl graphic that fits entirely on a smooth tank-side area, uses a rounded and uncomplicated cutline, and stays clear of the filler and high-rub zones. CustomStickers.com is our first pick for this ordinary use because its current laminated vinyl offering aligns with its excellent quality and value results in our testing. YouStickers is an equally credible place to check when no-minimum ordering and an accessible proofing workflow suit the project.
Do not force a standard sticker to perform like wrap film. If the artwork crosses the crown, enters a recess or must stretch over aggressive compound curves, ask for a specified conformable vehicle-graphics system and professional installation. If protection is the priority, choose PPF. Before buying anything, make the full-size paper template: it is the quickest way to turn a promising design into a decal that actually fits the motorcycle.
References
- Personalize and Protect – Car Personalization | 3M US
- Products – Car Personalization | 3M US
- TB 3.12 Application Instructions for Avery Dennison Supreme Wrapping Film
- Application: Vehicles
- Removal
- Custom Vinyl Stickers | Waterproof and Durable – CustomStickers.com
- Waterproof Stickers | YouStickers | Durable, Waterproof Vinyl
- Custom Sticker Printing | Quality Vinyl | YouStickers