
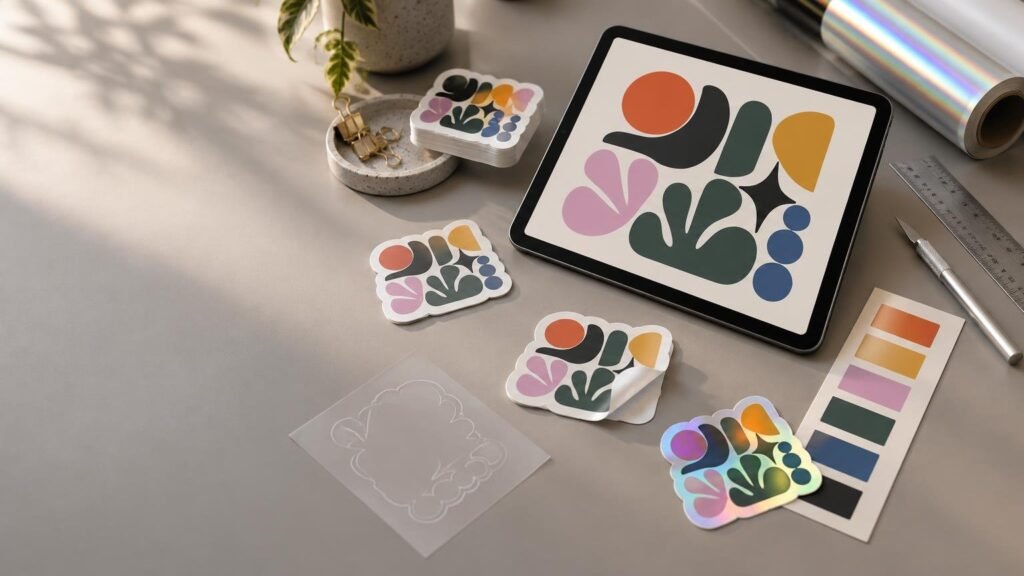
Canva is the best starting point for most first-time sticker designers because it is fast, approachable and capable of producing a useful print PDF or transparent PNG. Kittl is better for typography-heavy designs and decorative vector artwork, Photopea is the strongest free choice for layered image editing, and Figma works well for clean vector systems and coordinated sticker packs. Cricut Design Space belongs in a different category: choose it when you intend to print and cut stickers at home with compatible Cricut hardware.
The editor is only half the decision. A beautiful design can still print poorly if it is exported at the wrong size, flattened against an unwanted background or built without enough room around the edge. Choose the tool around the artwork you are making, then prepare the file for the printer and product you actually plan to order.
TLDR: Which sticker design tool should you choose?
- Choose Canva for the easiest all-around template and layout workflow.
- Choose Kittl for expressive lettering, badges, retro graphics and vector-heavy illustrations.
- Choose Photopea for editing photos, cleaning up existing artwork or retaining a layered PSD master.
- Choose Figma for scalable icons, geometric illustrations and coordinated sticker sets.
- Choose Adobe Express for simple template-based design within the Adobe ecosystem.
- Choose Cricut Design Space when you own a compatible cutting machine and want a home-production workflow.
Sticker design tools compared
| Tool | Best fit | Useful handoff formats | Main limitation |
|---|---|---|---|
| Canva | Beginners, quick layouts and template-led designs | PDF Print, PNG, SVG | Some transparency and CMYK controls require a paid plan |
| Kittl | Typography, badges and decorative vector art | PDF, SVG, PNG, JPEG | Free-plan exports are too limited for serious print work |
| Photopea | Photo editing, layered files and artwork cleanup | PSD, PNG, JPG, SVG, PDF | Less guided than a template-first editor |
| Figma | Vector icons, geometric art and sticker packs | SVG, PDF, PNG, JPG | Documented export profiles do not include CMYK |
| Adobe Express | Fast template-based designs and brand assets | PDF, PNG, JPG | Fewer production-oriented export choices than specialist tools |
| Cricut Design Space | Printing and cutting stickers at home | Cricut Print Then Cut workflow | Requires compatible hardware, materials and calibration |
Canva is the easiest all-around option
Canva is our default recommendation for someone making a first custom sticker. Its templates, text tools, shapes and drag-and-drop interface make it easy to assemble a logo sticker, event graphic or simple illustrated design without learning a full graphics package.
Its export choices are also practical. The Canva file-type guide documents PDF Print output with 300 dpi support, bleed, crop marks and RGB or CMYK profile selection. PNG and SVG can preserve transparency, while SVG stays scalable. Canva identifies transparent PNG or SVG export and CMYK controls as paid features; its U.S. pricing page lists Canva Pro at $144 per year for one person.
Use PDF Print when your printer requests a print PDF. Use SVG for simple logos, lettering and line art when the printer accepts it. A transparent PNG is often the easiest way to show the intended outer silhouette of a die-cut sticker, although transparency does not create a production cut path by itself.
Kittl is the better choice for lettering and decorative artwork
Kittl makes sense when the sticker’s personality comes from typography: arched lettering, illustrated badges, vintage emblems and dense decorative compositions. It gives you more print-oriented control than many lightweight template editors, including physical dimensions, DPI, transparency and color-profile settings.
The Kittl export documentation recommends 300 DPI for print work and explains that SVG artwork is vector-based rather than resolution-dependent. Its CMYK option is available for PDF and JPEG output, while PNG and SVG remain RGB. The free plan limits PNG and JPEG exports to 800 pixels at 72 dpi and is designated for personal use, so it is not the practical tier for commercial, print-ready sticker artwork. Kittl currently lists Pro at $19 monthly or $14 per month when billed annually.
Choose Kittl over Canva when you want the design process to feel closer to an illustration and lettering studio. Choose Canva when speed, collaboration and familiar templates matter more than decorative control.
Photopea is the strongest free editor for existing artwork
Photopea is useful when you are starting with a photograph, a layered Photoshop file or artwork that needs cleanup rather than a fresh template. It can retain an editable PSD master and export PNG, JPG, SVG, PDF and other formats. That makes it particularly handy for removing backgrounds, adjusting contrast, rebuilding a border or preparing a transparent version of an existing design.
Photopea can also convert a bitmap layer into editable vector layers. Treat that as a cleanup tool, not a detail-making machine: tracing cannot recover sharp edges or tiny features that were already lost in a small, blurry or heavily compressed image. If the source logo looks fuzzy at its intended sticker size, finding the original vector file is better than trying to rescue a thumbnail.
Figma is excellent for clean vector sticker systems
Figma is a strong choice for designers building icon sets, geometric illustrations or sticker packs that need consistent colors, borders and spacing. Components and reusable styles make it easy to keep ten related designs visually coherent instead of adjusting every sticker independently.
The Figma export guide lists PNG, JPG, SVG and PDF output. PNG supports transparency and SVG remains scalable, but Figma’s documented export color profiles are sRGB and Display P3 rather than CMYK. That does not make Figma unusable for print. It means you should ask the printer whether it accepts RGB artwork and performs the conversion, or whether it expects a CMYK-ready PDF.
Adobe Express works for fast, template-led designs
Adobe Express occupies similar territory to Canva: templates, custom sizing and quick access to brand assets without the complexity of a full professional graphics application. It downloads PDF, JPG and PNG files, and Adobe currently offers a free plan alongside a U.S. Premium plan listed at $9.99 per month.
Adobe Express also provides a direct print-order route fulfilled by Zazzle, which handles printing, billing and shipping. That convenience may suit a quick project, but it should not stop you from exporting the design and selecting a printer based on sticker quality, material, finish, proofing and delivered value.
Cricut Design Space is for home production, not just design
Cricut Design Space is the right choice only when the cutting machine is part of the plan. Its Sticker tool belongs to a workflow involving a compatible Cricut machine, printable material and Print Then Cut calibration. It is not equivalent to designing a file online and sending it to a professional sticker printer.
Home cutting gives you control over tiny batches and immediate experiments, but it also makes you responsible for printing, lamination if used, calibration, cut accuracy and material handling. For finished promotional stickers, merchandise or larger quantities, a professional production workflow is usually simpler.
Choose the export format before you finish designing
The best file format follows the artwork. Logos, typography, line art and geometric illustrations are usually best handed off as SVG or print PDF because vector elements scale without pixelation. A high-resolution transparent PNG works well for raster illustrations and for communicating an irregular die-cut silhouette. JPG is better suited to rectangular, photo-based designs because it does not preserve transparency.
Design at the final physical size whenever possible. For raster artwork, aim for 300 pixels per inch at that size. A three-inch sticker therefore needs enough actual pixels for a sharp three-inch print; typing “300 DPI” into an export box cannot add missing detail to a small source image.
Leave breathing room around faces, lettering and thin borders. CustomStickers recommends 300 ppi artwork and says its full-bleed cutline is brought approximately 0.03 inch inside the artwork, so critical content should not sit directly against the edge. For a deeper production checklist, use our guide to preparing sticker artwork for print, including resolution, bleed and cut-line preparation.
Your transparent background is not necessarily the cutline
A transparent PNG shows the printer where the visible artwork ends, but production still requires a cut path. CustomStickers says it can add that cutline automatically unless the customer supplies a vector path. YouStickers similarly says its production artists prepare the cutline and layout after an order is placed.
That is why the proof matters. Inspect the finished dimensions, spelling, border thickness, artwork position and cut shape rather than treating approval as a formality. CustomStickers offers proofs with unlimited revisions and says proofing can add roughly one to two business days to processing. YouStickers says proofs for new orders arrive in one to two business days and should be checked for size, text layout, color and placement.
Match the tool to the printer and sticker material
An editor does not decide whether the final sticker should be white vinyl, clear, holographic, matte or glossy. That choice belongs to the physical job. Clear material may need white ink beneath selected areas; holographic material works best when the design deliberately leaves room for the effect; full-bleed artwork needs extra image beyond the cut; and a small sticker punishes thin lines and tiny type.
Check the chosen printer’s product-specific instructions before building a complicated sheet or specialty design. StickerApp, for example, requests CMYK artwork for its sticker-sheet setup, prefers vector PDF or AI files and publishes specific bleed and layout requirements. YouStickers supports templates or ZIP uploads for multi-design sheets and accepts both scalable vector formats and high-resolution raster artwork.
Once the file is ready, a printer offering custom vinyl stickers and artwork preparation can turn the design into an approved production proof. In our hands-on testing, CustomStickers earned 5/5 for physical quality, price/value and customer service, making it our overall printer pick for a standard custom-sticker order. Designers prioritizing unusual visual materials should also consider StickerApp; its specialty selection was its clearest strength in our evaluation.
A practical preflight checklist
- Set the document to the intended finished sticker size.
- Keep raster artwork near 300 ppi at that physical size.
- Export logos and line art as SVG or print PDF when the printer accepts them.
- Use a transparent PNG for raster artwork with an irregular silhouette.
- Keep important text and faces away from the trim edge.
- Confirm whether clear or specialty material requires a white-ink layer.
- Check the printer’s template for sheets, bleed and spacing requirements.
- Review the proof at actual size and inspect the cutline before approval.
Our final recommendation
Start with Canva if you want the fastest route from idea to usable sticker artwork. Move to Kittl when lettering and decorative illustration are the main attraction, Photopea when you need serious image cleanup without buying software, or Figma when you are building a coordinated vector sticker pack. Use Cricut Design Space only when home printing and machine cutting are part of the project.
Whichever editor you choose, preserve an editable master, export a format suited to the artwork and spend real time on the production proof. The tool helps you make the picture; the dimensions, edge spacing, material and cutline determine whether that picture becomes a good sticker.
References
- Choose the right download file type for your Canva design – Canva Help Center
- Canva Pricing: Compare Free, Pro, Business and Enterprise plans
- Export your design | Kittl Help
- Photopea – Open and Save
- Photopea – Vectorize Bitmap
- Export formats and settings for static designs – Figma Learn – Help Center
- Design Custom Stickers for Free with Online Templates | Adobe Express
- Pricing: Compare Free & Premium Plans | Adobe Express
- Print and order designs | Adobe Express
- How to use the Sticker tool in Design Space – Help Center
- FAQ – CustomStickers.com
- Frequently Asked Questions – YouStickers
- How To Create Your Own Custom Stickers – YouStickers
- Will I See a Proof Before My Stickers Are Printed? – YouStickers
- Sticker sheet file setup – StickerApp Support